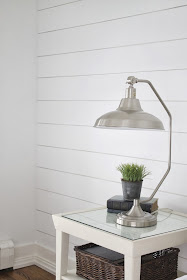
The planked bedroom wall is done!
About a week ago, I posted about the progress we made on this project and this past weekend, we were able to finish it up.
As I previously talked about, we needed to safely cover up the outlets that we don't plan on using.
We started by attaching a metal socket plate (I think that's what they're called) using screws.
Then, we covered it up with some planks and spackled the nail holes and seams.
Here it is all patched up.
Only if you look real close can you tell that it is behind there.
We also had to extend an outlet that we still want to use.
All this involved was loosening the screws so that the ends of socket could sit on top of the planks.
Lastly, we caulked the edges along the baseboard and the ends of the walls to give it a more finished look.
Here's a look at the finished product (ignore the bedding as that is another project in progress that you can read about here):
Overall, we are happy with how this project turned out and were surprised with how relatively simple it was. Now, onto tackling the rest of the bedroom!
Have a great day!
- Caitlin


Soooo incredible! Absolutely love it! xx
ReplyDeleteYou guys did such a wonderful job! It looks fantastic and I can completely relate on the tough bedding decision. I have been looking for bedding for over a year now (four sest and three rugs later!) I have yet to settle. I can't wait to see what you choose.
ReplyDeleteLooks amazing!!!
ReplyDeleteLove it! Are you going to hang any art anywhere?
ReplyDeleteyes definitely, this room is not nearly complete!
DeletePlanked walls are a dream come true. I hope to put some in when we finally have a house of our own. Thanks for the tips -- I need to file these away.
ReplyDelete